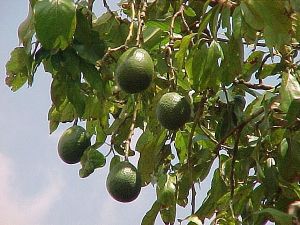
Avocados for weight loss and beauty

We have been told to avoid the avocado because of its “high caloric and fat content”.
Aside from being very high in fiber, avocados provide essential nutrients such as A, B-complex, C, E, H, K, and folic acid, plus the minerals magnesium, copper, iron, calcium, potassium and many other trace elements. They also provide all of the essential amino acids our bodies need plus 7 fatty acids, including Omega 3 and 6.
Avocados contain more protein than cow’s milk.
Avocados contribute nearly 20 vitamins, minerals and phytonutrients. Phytonutrients are thought to help prevent many chronic diseases.
In place of other heavier animal fats, avocados can be a satisfying addition to a low-calorie, healthy diet. Avocados can actually help you LOSE weight!
The Aztecs used the avocado as a sex stimulant, and archeologists have found the avocado seed buried with Peruvian mummies dating to 750B.C.
Early Americans called it the alligator pear, because they could not pronounce the Spanish word for avocado, ‘aguacate’.
European sailors called it “Midshipman’s Butter,” because they liked to spread a rich, guacamole-like substance on biscuits.
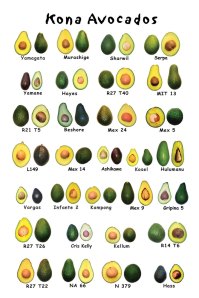
There are eight varieties of avocado grown in the US, but the Haas variety remains the most popular. It’s hard, textured skin makes it easier to ship and when it turns dark consumers can be sure it is ripe.
From San Luis Obispo to San Diego California is the largest growers of U.S. consumed avocados. San Diego County calls itself the “avocado capital” of the world. You may find a few in Florida but 95 percent are from CA.

In his book The Sunfood Diet Success System, David Wolfe, founder of Sunfood Nutrition writes about avocado oil being closely related to our skins natural oil. As a veteran professional beauty consultant I have used avocados and avocado oil for dry hair and skin treatments on many clients. You will often see cosmetic products claiming the use of avocado oil as their miracle cure. Hey, there’s a produce stand or grocery store near by, why not just use fresh, unprocessed avocados for the overwhelming health benefits in side and out!

I use avocados in many recipes ranging from chocolate mousse and cupcake frosting to wraps, spreads, dips and dressings. Any day of the week you can find avocados in my kitchen. I’ve even been known to take them on the go with me and enjoy them with lemon pepper as a nutritional mid day snack.

Purchase avocados unripe and let it ripen at room temperature. When the narrower tip (blossom end) is soft to the touch, it is ready to eat and it should be eaten promptly. They will not ripen in cold.

Here’s my quick and easy guacamole ‘go-to’ recipe. I often have my 4 year old son mash the avocado and stir in the seasonings. You can vary it according to your tastes and mood.

Ingredients
4 to 5 large avocados
2 fresh limes
1 medium white onion, diced (or onion powder or dried onion for flavor if you don’t have fresh)
3/4 cup cilantro, chopped finely
1 large tomato, ripe but firm, diced
1 fresh jalapeno, finely chopped (optional)
dash cumin
pinch sea salt

Mash avocados in a bowl. I enjoy the chunks of fresh avocado so I lightly smash them rather than make them creamy.
squeeze in 1 lime. Add the rest of the ingredients and stir. If needed squeeze in the second lime. Adjust to your taste.
Hint; if you save the seed and put it in the bowl your guacamole will stay fresh longer while stored in airtight container.

Oh, and by the way, those crispy amazing chips are home made and RAW! 🙂
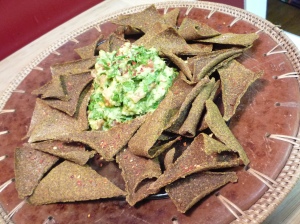
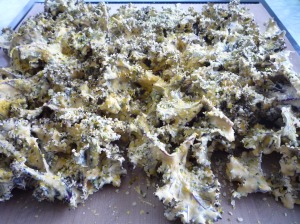
Cheesy & Nacho Cheese Kale Chips! No more ‘Doritos’!

Kale chips

Kale chips

This is one of my most requested recipes. I hope you like it as much as we do!
Kale chips are a personal favorite around here. I make two big batches of these at a time and they are gone within a few days. I have certain friends who seem to know when I’m making a new batch because they always seem to show up just in time to help devour them! Salty, savory, sweet, you can adjust the recipe to your mood. Experiment, try the basic recipe and divide it in half, make half savory and half spicy or sweet.
Chose your favorite sauce below. Rinse and drain 1 large bunch of kale. Put kale leaves in a large bowl. If you use the curly leaf kale you will have more flavor pockets where the sauce hides in the curls of the leaves!
After you get your sauce blended and seasoned to your liking pour sauce over kale leaves and mix by gently squeezing sauce and kale with your hands until your kale is fully covered.
Lay out on dehydrator tray and sprinkle with hemp seeds. I even add more nutritional yeast on top for added “cheesy” flavor.

Sauce base
1 C. Pumpkin Seeds, soaked 3 hrs, rinsed well
1 Tbsp. Sesame Tahini
juice of 1 Lemon
1/2 teasp. Sea Salt
Water as needed

Add pumpkin seeds, tahini, lemon and salt to blender. Add water 1-2 Tbsp. at a time. (enough to blend ingredients well but not to make sauce runny. I like the sauce thick so it will stick to the kale well!) Blend all ingredients until smooth.

Cheesy Sauce
Sauce base then add;
1 Red, Orange or Yellow Bell Pepper, diced
2-3 Tbsp. Nutritional Yeast
1 Tbsp. Hemp Seeds, + 1 Tbsp. set aside
1 tsp. Onion Powder
1/2 tsp. Agave syrup (optional)

Add to sauce base in blender and blend until smooth. If needed add a touch of water. You want mixture thicker than salad dressing but thin enough to pour.

Nacho Sauce
Sauce base then add;
2-3 Tbsp. Nutritional Yeast
1 Bell Pepper, chopped (red, orange or yellow)
1 ripe Tomato OR a couple of Sundried Tomatoes, soaked for 1 hr.
Small handful Cilantro leaves, chopped
1 Clove Garlic
1/4 tsp. Onion powder
1/4 tsp. Cumin
1/4 tsp. Cayenne
1/4 tsp. paprika
1/4 tsp. Oregano
1/4 tsp. Chili powder
1/2 tsp. Agave Syrup, optional
Chili (Red Pepper) flakes and hemp seeds to shake on prior to dehydrating.

Add ingredients into blender with sauce base and blend until smooth. Add water as necessary. Cover kale in sauce and lay kale pieces onto dehydrator sheet.
Sprinkle red pepper flakes and/or Hemp Seeds over leaves.
Dehydrate @ 105 until crispy.
Enjoy!

Living gluten-free, vegan chocolate chip cookies

Yep, that’s right! These are RAW, gluten-free, egg-free, dairy-free, sugar-free and packed full of childhood memories!
Home made chocolate chip cookies have to be one of the most popular childhood cookie treats. I can remember the days when as kids we would try to sneak into the kitchen and steal a chocolate chip cookie. I swear my father could hear the lid on the cookie jar from all the way across the house! Those were his favorite cookies too, after all!


Melting chocolate chips, MMM!

Living Raw Chocolate Chip Cookies

2 C. ground Almonds or Cashews (I use half almond pulp from nut milk and half ground cashews)
1/4 to 1/3 C. Coconut Oil, softened
1/3 C. Agave nectar
4 Medjool dates, made into date paste using coconut water or filtered water
2 teaspoons Vanilla extract
1/2 teaspoon Sea Salt
1 Tablespoon Coconut Butter, melted
1 Tablespoon Maca powder
hand-full of cacao nibs or chocolate chunks (*make your own chocolate chunks, see below)
(optional) chopped walnuts, pecans or hazelnuts
HINT: if you want a chewier, more ‘baked’ texture you can add ground oat groat flour to your recipe. Just add as you mix until you achieve the desired consistency.

In food processor fitted with ‘S’ blade mix all ingredients except chocolate (or cacao nibs) and walnuts.
If you do not have a food processor just mix in a large bowl making sure that all ingredients get well blended.
Add chocolate chunks and walnuts or pecans.
Drop by spoonfulls onto Teflex sheet. Dehydrate at 105 degrees 4-6 hours or until you get desired texture. If you allow them to stay in a bit longer you can get a “cooked” texture, crispy on the outside and soft, chewy in the center.
Somehow I seem to be able to eat them before they even get dehydrated… cookie dough anyone? 😉

*Quick and easy Chocolate Chunks (raw, living chocolate!)
Equal parts melted coconut oil and cacao powder, add agave to taste and a pinch of sea salt. You can also use carob powder. Whisk together, pour mixture into a flat dish and chill in freezer until hardened. You can break or chop hardened chocolate into chunks. Be careful, this could become habit forming!

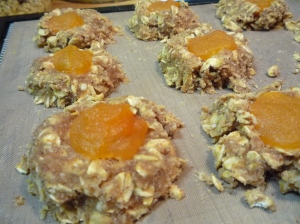
Raw, Living Apricot Thumbprints

These are easy, delicious and fun to make! Apricot Thumbprint cookies ready to go into the dehydrator
I use left over almond pulp because we drink a lot of almond milk. If you don’t have or want to make the pulp you can simply grind almonds in a coffee grinder until you get a fine grind or powder. Just be careful not to grind it into almond butter!

2 C. Almond pulp
1/3 C. Coconut Oil, melted
1/3 C. Agave nectar
2 teaspoons Gluten-Free Vanilla extract
1/2 teaspoon Sea Salt
4 Medjool Dates, blended into a paste using 1/4 to 1/3 C. coconut water. (or filtered water)
1 teaspoon Maca powder
1-2 C. Steel cut oats or Oat Groats, ground
*Apricot jam (see below)

Make your date paste, soften the coconut oil and if needed grind almonds.
In large bowl, mix all ingredients except oats until blended. Gradually add oats until you get cookie dough-like consistency. (you will know as mixture will thicken and stand up well without flattening when dropped by spoonful.)
Drop by spoonful onto Teflex dehydrator sheet. Press thumb into center to make a well into cookies. Add apricot jam into center. Dehydrate at 105 until you get desired “cooked” edge. (typically 4-6 hours you will have a nice outside edge and soft center, longer will give you a more ‘cooked’ texture.)

*Apricot jam can be made by putting apricots and agave into the blender. I add Irish Moss one ounce at a time until I get the desired thickness.

These cookies actually make a great cookie cutter cookie. My son pressed the dough onto the Teflex sheet and used cookie cutters to make shapes. It worked great!
Personally, I love this recipe with cacao nibs, but then again, doesn’t chocolate go with everything? 😉

The best ever quick & easy gluten-free pancakes!

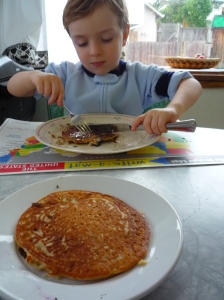
P1030417

These are the easiest and best gluten-free pancakes I have ever made! I’ve tried them all, believe me. I quit making them from scratch because it seemed like they were all too heavy, glue-like, flavorless, sticky or just plain lacking in nutrition.
This recipe is quick, easy, nutritious and best of all DE-LISH!
You will not need a ton of water to wash these down. After eating a huge plate full I still have the energy to face the day!

I adapted this recipe from our local PCC (co-op grocery) newsletter. (recipe by Marie Donadio) There are a few things I changed for my own personal tastes.

Prep time 10-15 minutes!

Ingredients

2 C. Quinoa flour
2 Tbsp. Baking Powder
1/4 tsp. Baking soda

Mix all dry ing. together with whisk in bowl and set aside.

1/2 C. RAW Cashews, soaked 2-3 hours and rinsed well, drained. (be sure to rinse well as raw nuts have an enzyme inhibitor which can make digesting them difficult and lead to stomach pain. Simply soaking and rinsing cures this problem!)
2 C. Filtered Water
1 teaspoon Vanilla Extract (gluten-free, alcohol-free)
1 teaspoon Lemon Juice
1 teaspoon Agave, Honey or Maple Syrup (more to taste as quinoa tends to be a bit less sweet than other flours.)
pinch Sea Salt
Blend all ingredients together in blender two or three times until mixture has a smooth, milky, frothy consistency. You may need to pause to scrape the blades to make sure there are no nut pieces.
(you are essentially making cashew milk!)
Pour liquids over dry ingredients and whisk until no lumps and well blended. If your batter is too thick you can add a touch of water as needed.
I use COCONUT OIL on my cast iron griddle as it is healthy, light and add a super delicious flavor!
We added fresh organic blueberries and spread warm coconut butter and real maple syrup on top! YUM-MY!!

*for variations add shredded or dices apples and cinnamon or fresh fruit. Add flaxseeds into the blender with the cashews for added nutrition.
*For heavier more buckwheat type pancakes simply substitute 1 Cup of the quinoa flour with Buckwheat flour and use 2 TBSP. of baking powder.

For easy ‘whip cream’ to top fruit you can simply blend cashews, macadamia nuts or fresh young Thai coconut meat with coconut water and agave to taste in your blender until smooth and creamy. (If you do not have coconut water you can use a touch of nut milk or water and sweeten with agave, honey or maple syrup.)